How to deploy asp.net web application in azure
In this video we will discuss, how to deploy a web application (specifically asp.net webforms application) in azure. It doesn't really matter if it's web forms, MVC, or .NET core, the process is the same. You will see how easy it is. With just a few clicks, in just a few minutes, you have your app up and running.
Hosting web application in your own on-premises server
Compare this to hosting the application in your own on-premises server. It involves a lot of things.
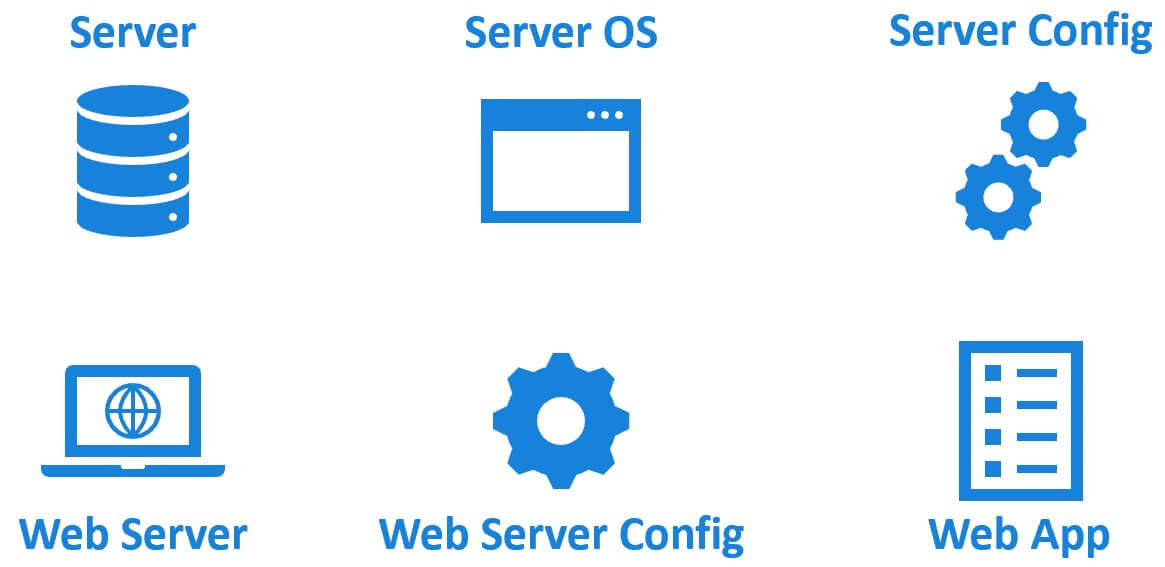
- We need a physical or a virtual server
- Server operating system like windows or linux must be installed
- The server needs to be secured and configured. Install antivirus software, updates and patches. Configure firewall settings etc.
- To host a web application and make it available on the web, you need a web server like IIS, Tomcat, NGINX etc.
- You need to install and configure it correctly like security permissions, application pools, SSL setting etc.
- On top of this, you install your web application and any dependencies it may have.
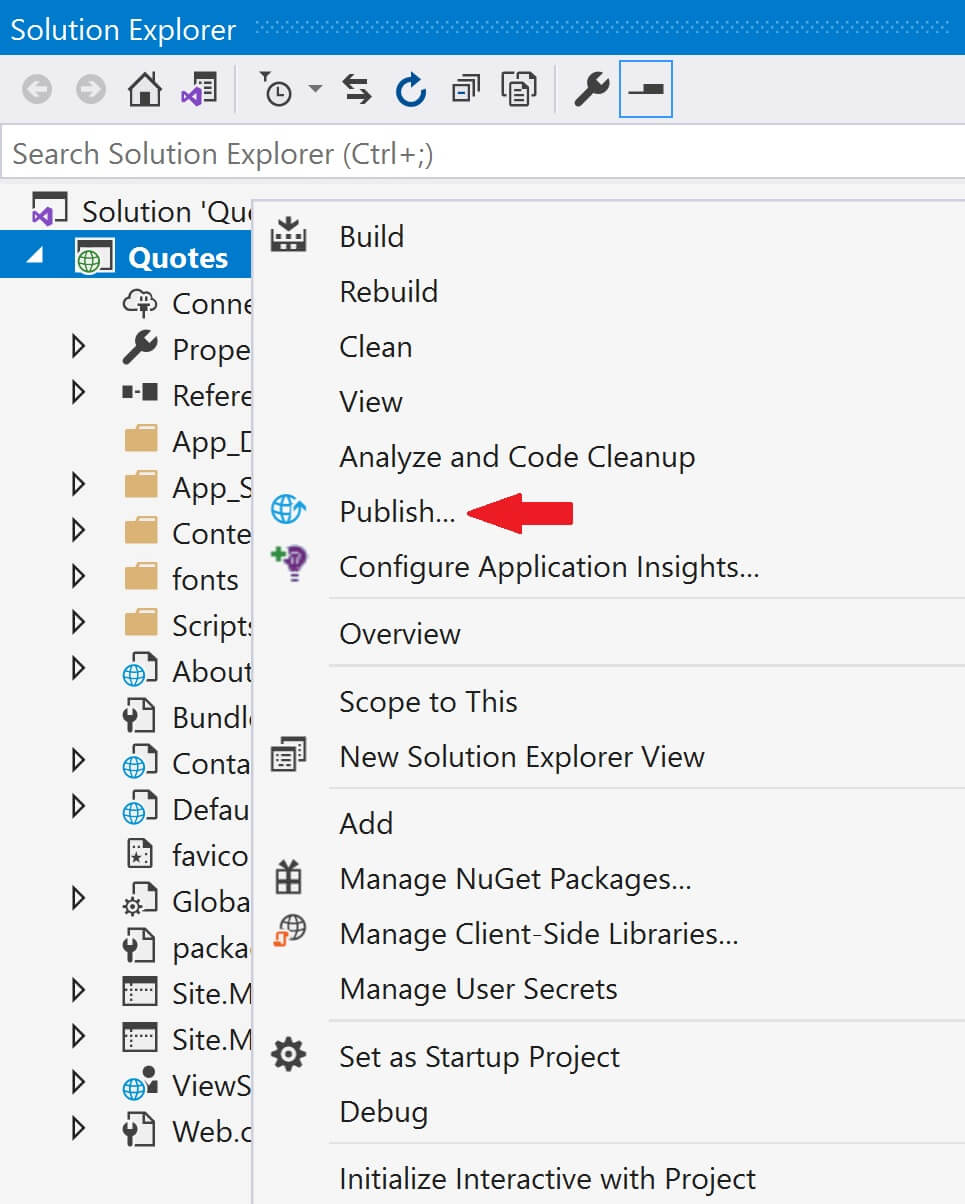
Deploying asp.net web application from visual studio to azure
In the Solution Explorer, right click on the web application project and click on Publish
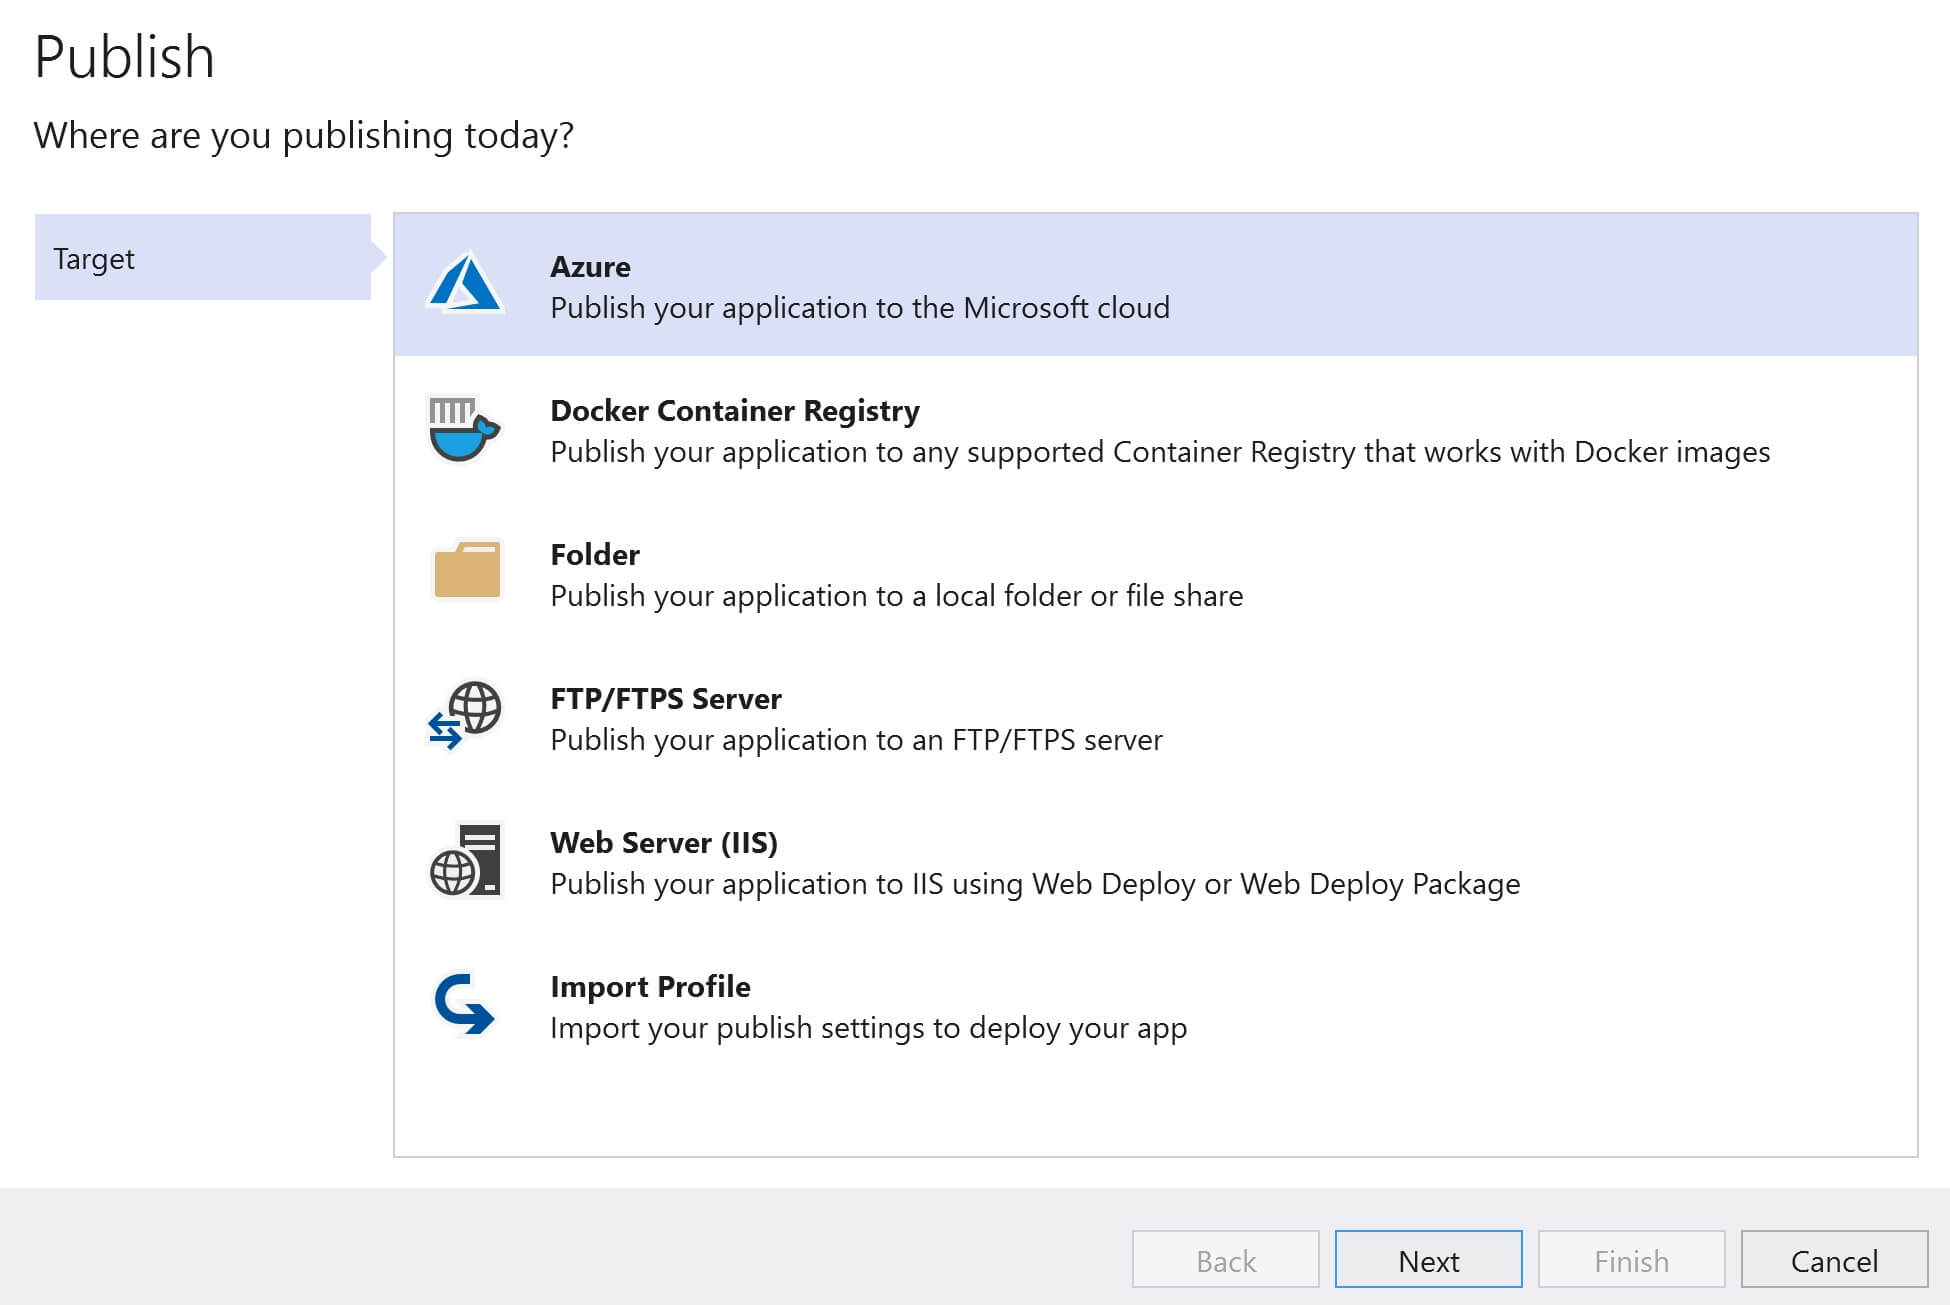
Select Azure and click Next
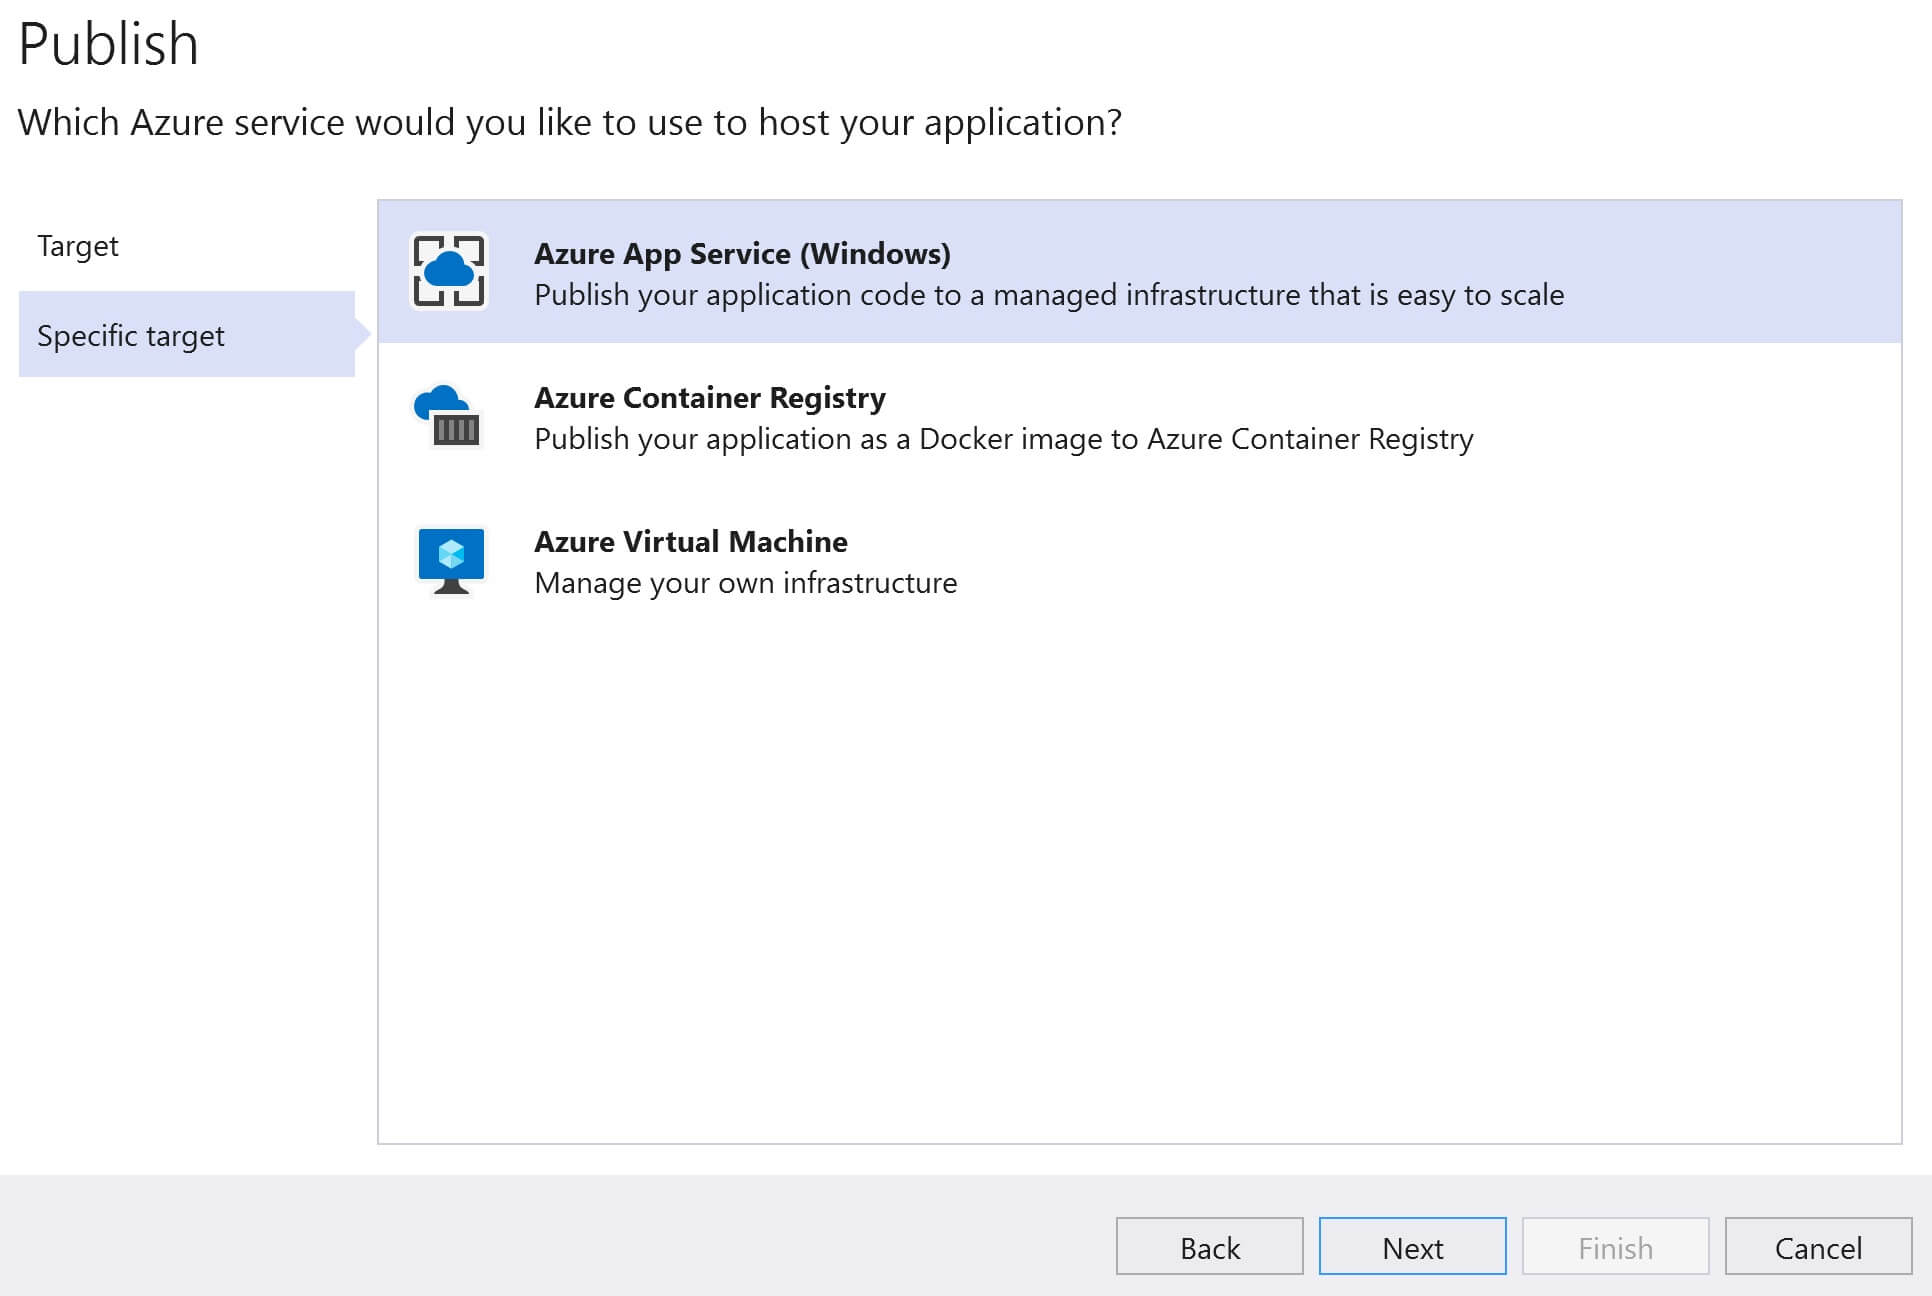
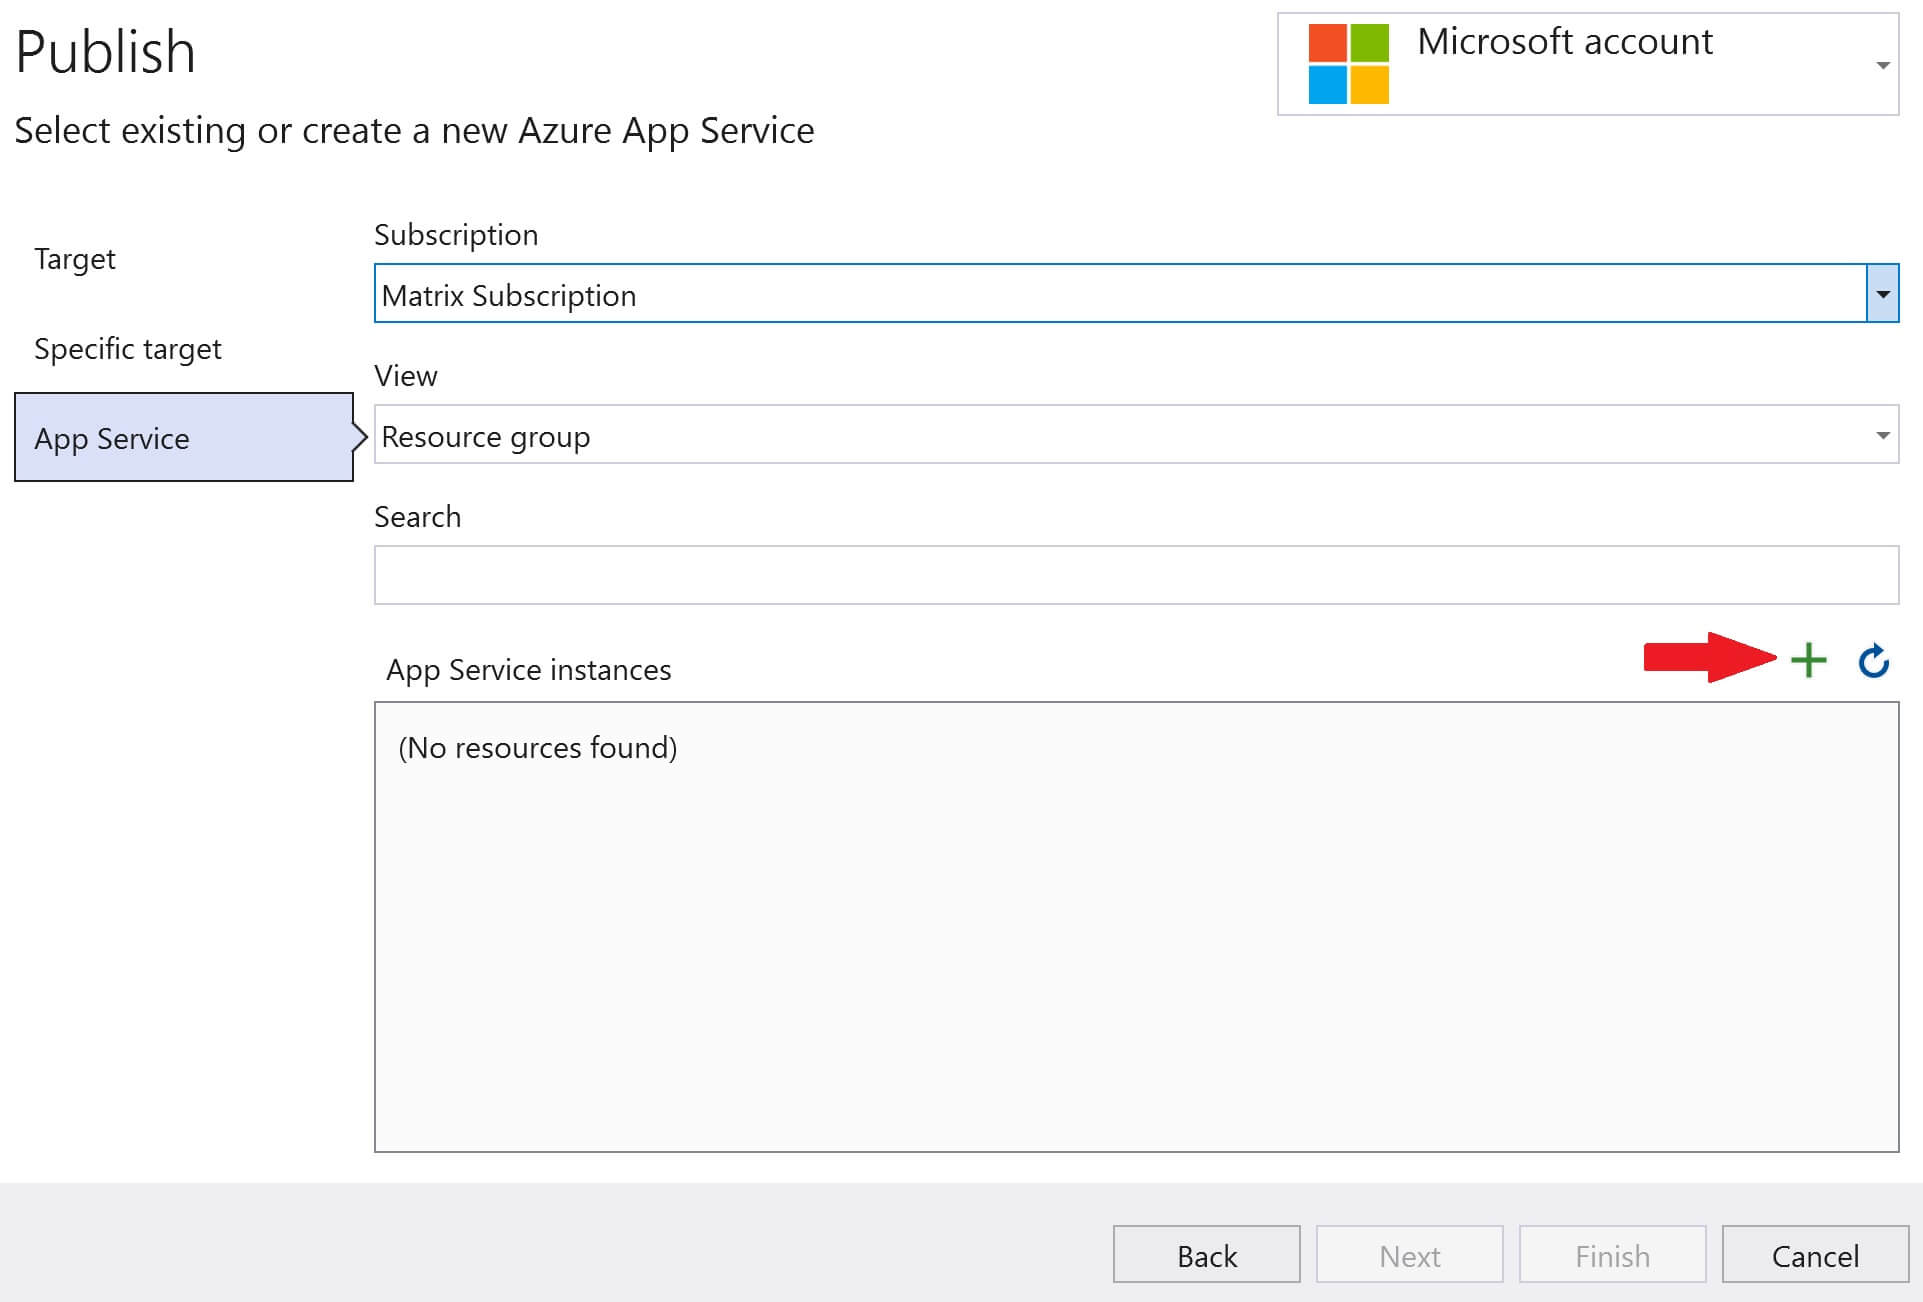
Select Azure App Service and click Next
Click on the + sign
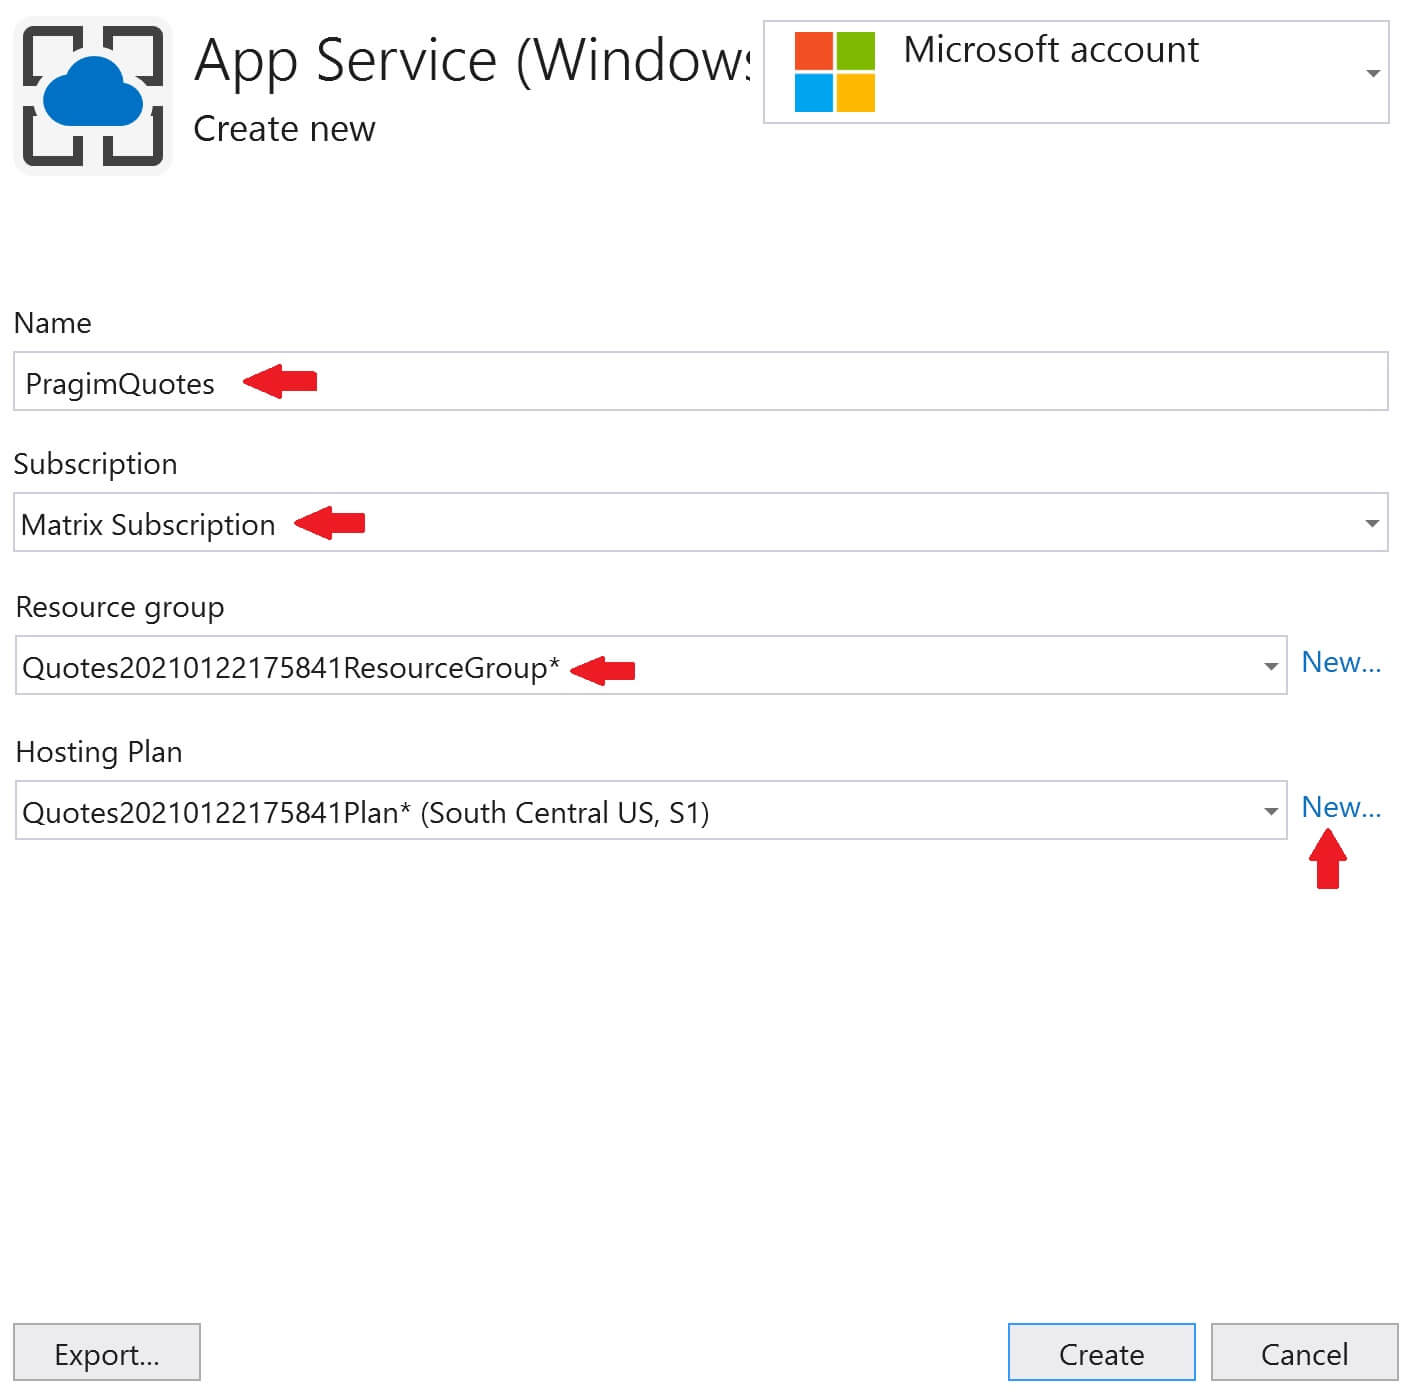
- Provide a
Namefor the App Service. This is the name that will be used to access the web application.PragimQuotesis the name I used, so to access the application I use the following URL in the browser. - https://PragimQuotes.AzureWebSites.net
- Select your
SubscriptionandResource Group. - Finally hosting plan. We want to use a free hosting plan. Click on the
Newlink.
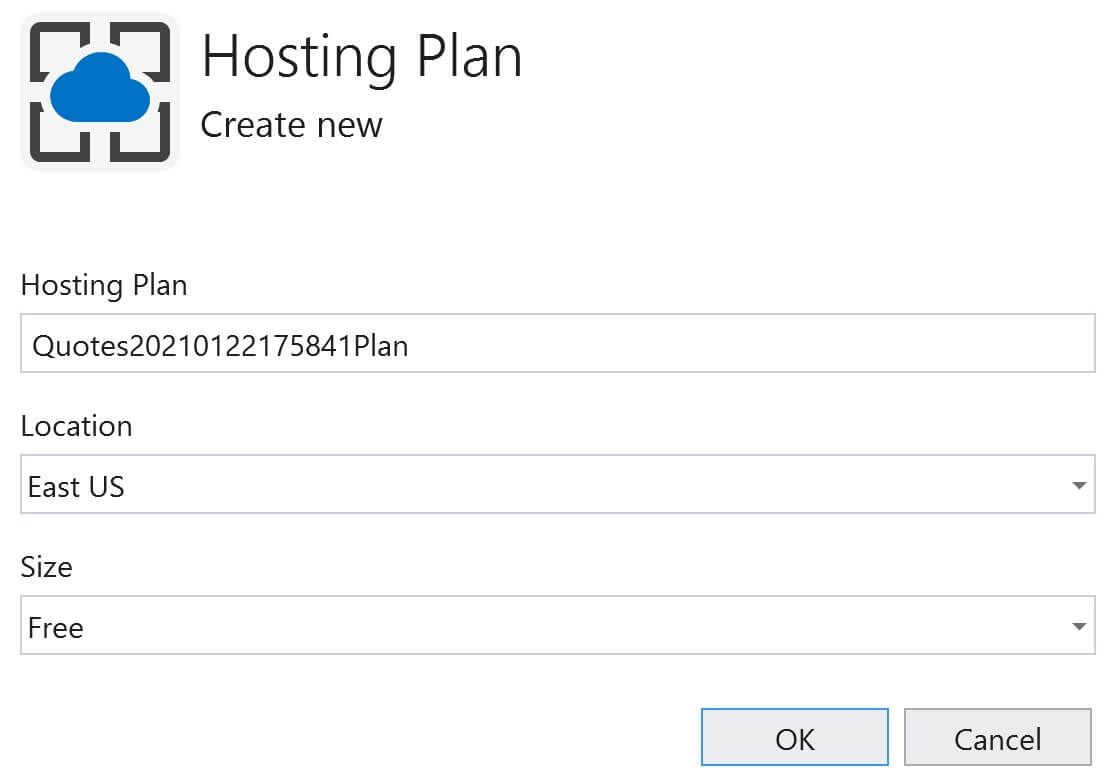
- Provide a
name,locationand thesizefor the Hosting Plan. It is the size that determines what you pay and what features you get. I selected theFreepricing tier. - Remember to host a web application in Azure we need App Service and an App Service Plan. We discussed App Service and App Service Plan, including how to create them in the Azure portal, in our previous videos in this series.
- Right now, we are creating them (App Service and App Service Plan) from within visual studio instead of going through the azure portal.
- Click OK and the Finish.
You will then be back on the following Publish screen. In the dropdownlist, your App Service is selected. Click on the Publish button.

In a few minutes your app will deployed to azure and you can access it using the URL https://pragimquotes.azurewebsites.net
In our next video, we will discuss how to deploy a web application that has a dependency on a database like SQL Server for example.


© 2020 Pragimtech. All Rights Reserved.