Create azure virtual machine scale set
In our previous article, we discussed what is a virtual machine scale set and why we need it. In this article, we will discuss how to create a virtual machine scale set.
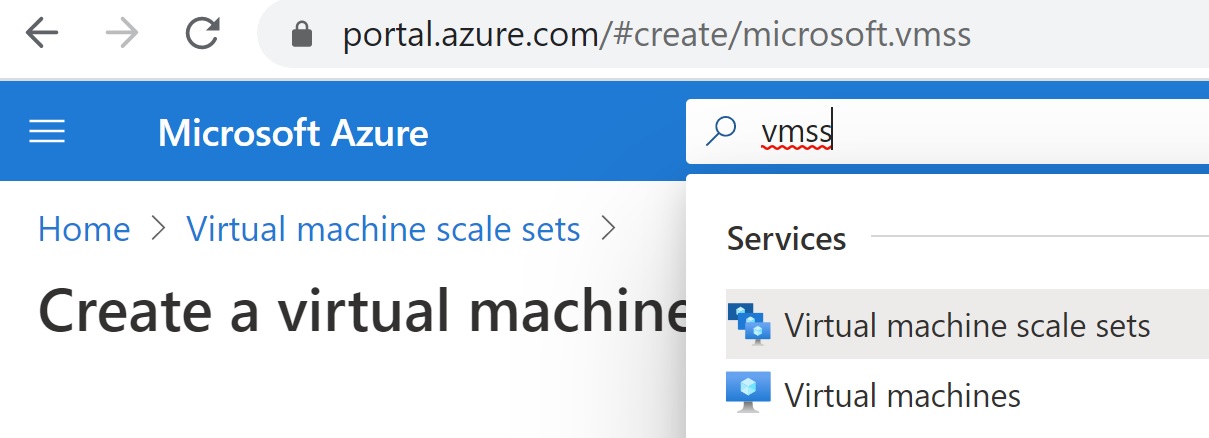
As usual in the azure portal search for virtual machine scale set or it's acronym VMSS.
Click on "Virtual machine scale sets" and then "Add"
Create a virtual machine scale set - Basics tab
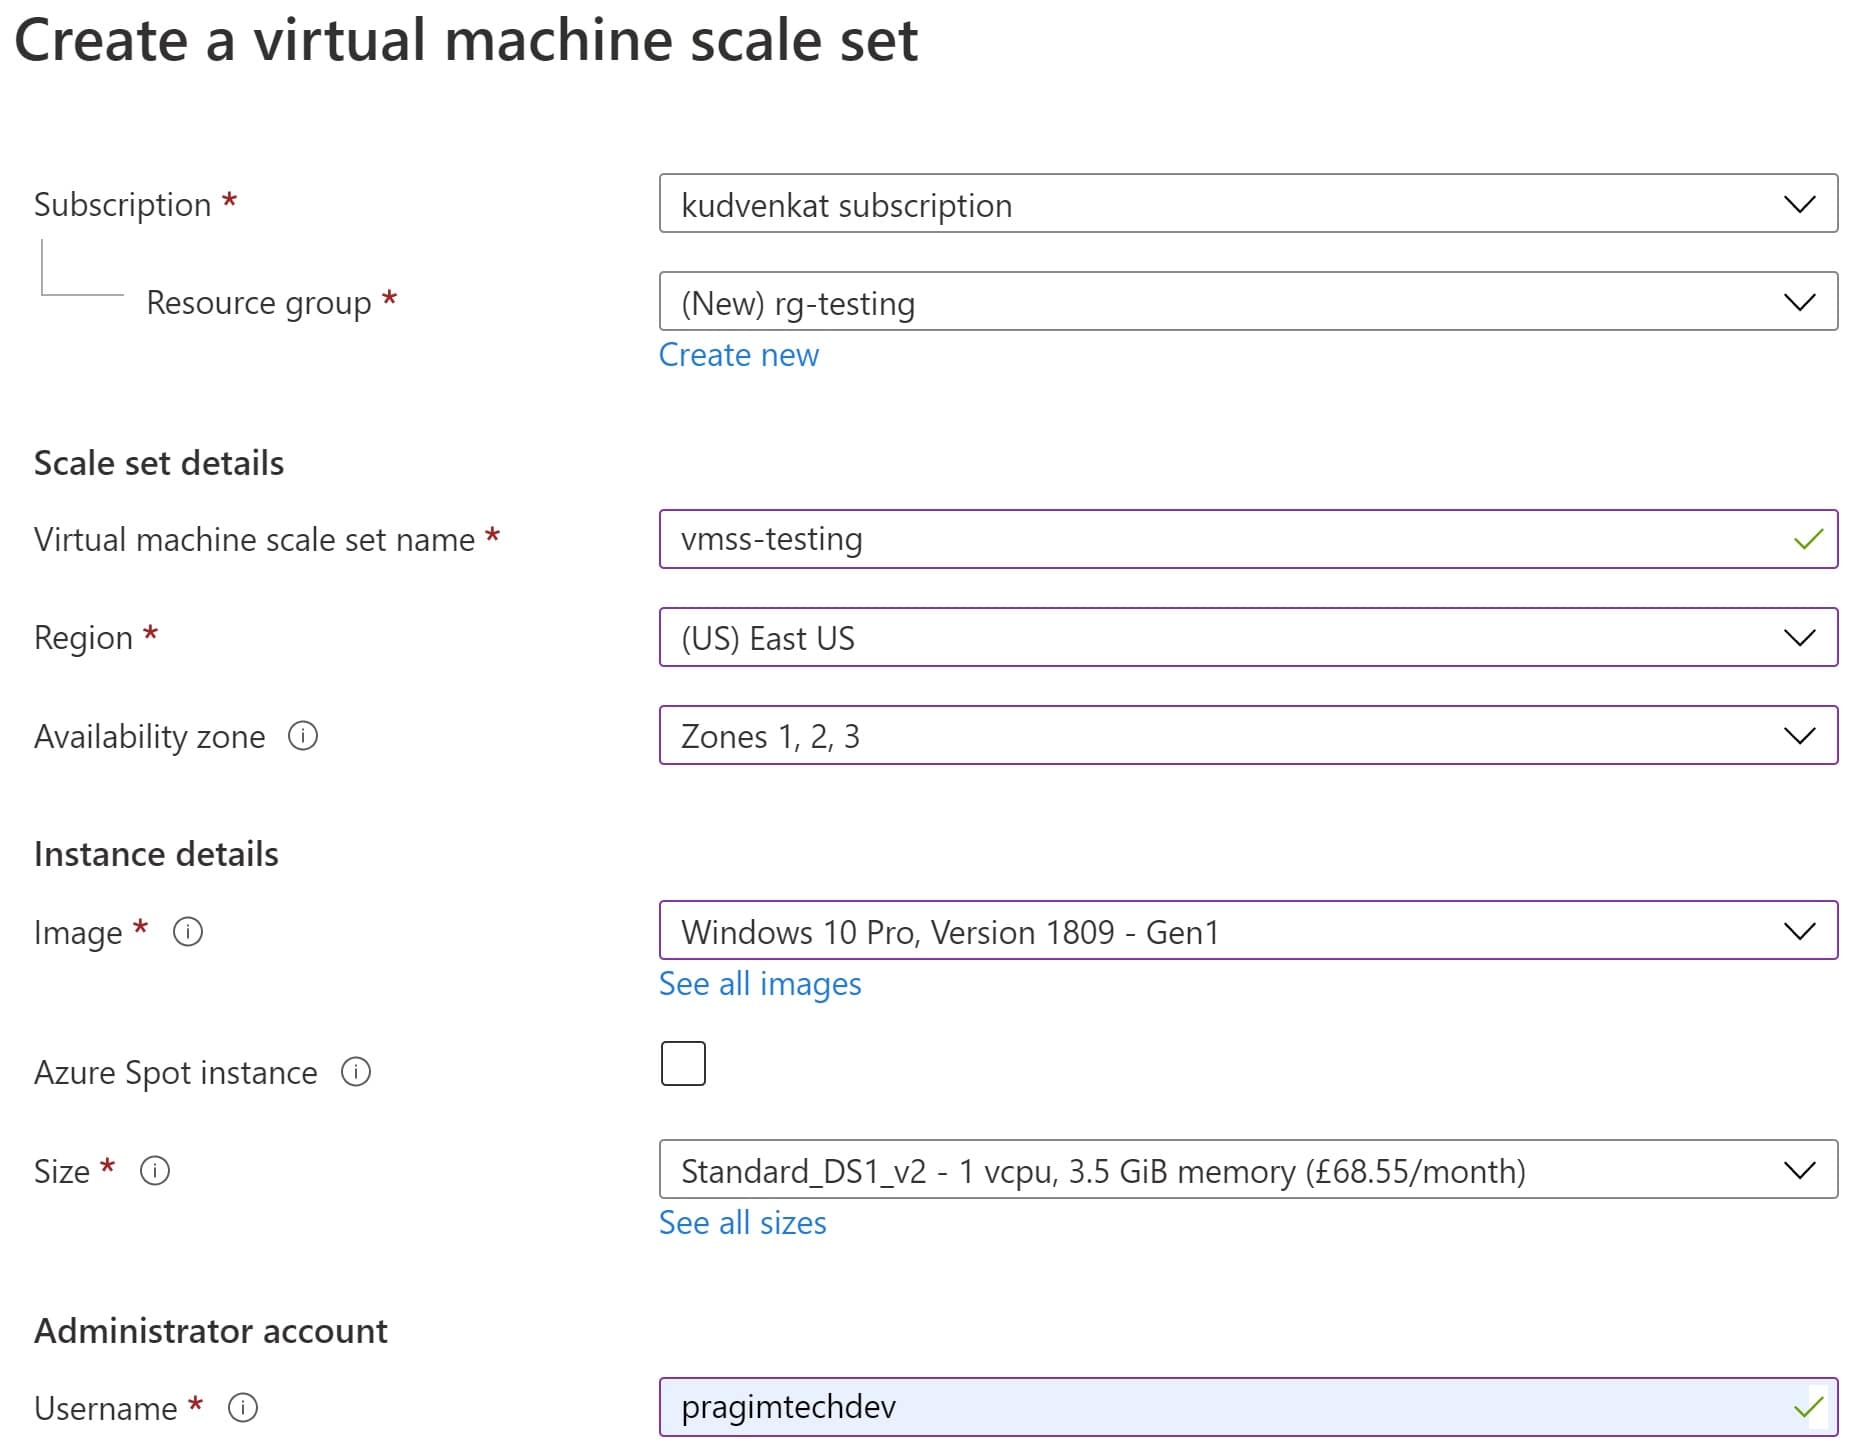
Subscription - Select your azure subscription
Resource Group - Select one of your existing resource group or create a new one. A Resource Group is a group of related azure resources. This grouping allows us to manage all the resources that belong to a specific application and deployment environment as one unit. We can even automate deployments using Azure Resource Manager Templates. We discussed Resource Groups in detail in Part 5 of this video series.
Virtual machine scale set name - Provide a name for the VM scale set. Common convention is to use the prefix vmss. As we are using this virtual machine scale set for a demo, I am going to name it vmss-demo.
Region - Azure region where you want the VMSS to be created. The region you select determines the further options and features available. For example, if you select "South India" region, you don't have availability zones supported. So, if you are building high availability systems and you need availability zones, you may have to select a different region that supports availability zones. I know East US region supports availability zones, so I have selected it.
Availability zone - Check all the availability zones into which you want your VMs to be placed. If you select 3 availability zones and you create 3 virtual machines in your scale-set, each VM will be placed in a separate availability zone. If you have 6 VMs, in your scale-set, then each availability zone will contain 2 VMs.
Image - The base operating system you want on the VMs. You have several choices - Windows or Linux.
Azure Spot instance - This option is great for cost saving. Basically it allows us to use unused azure capacity at a significantly low price. However, at any point in time, when Azure needs the capacity back, the Spot VMs are evicted with just 30 seconds notice. Therefore, Spot VMs are great for workloads that can handle interruptions like batch processing jobs, development/test environments, large compute workloads etc.
Size - The size of the VM. It determines processing power, memory, and storage capacity. An hourly price is charged based on the VM's size and operating system.
Username - Administrator username for the VM
Password - Administrator apssword for the VM
Disks tab
Leave the default settings on the Disks tab
Netwroking tab
On the Netwroking tab we configure three things for our VMSS
- Virtual network
- Network interface
- Load balancing
Virtual network - Virtual network or VNet as it is commonly called allows Virtual Machines to securely communicate with each other, the internet, and on-premises networks. It is similar to a traditional network that you see in your own on-premise data center.
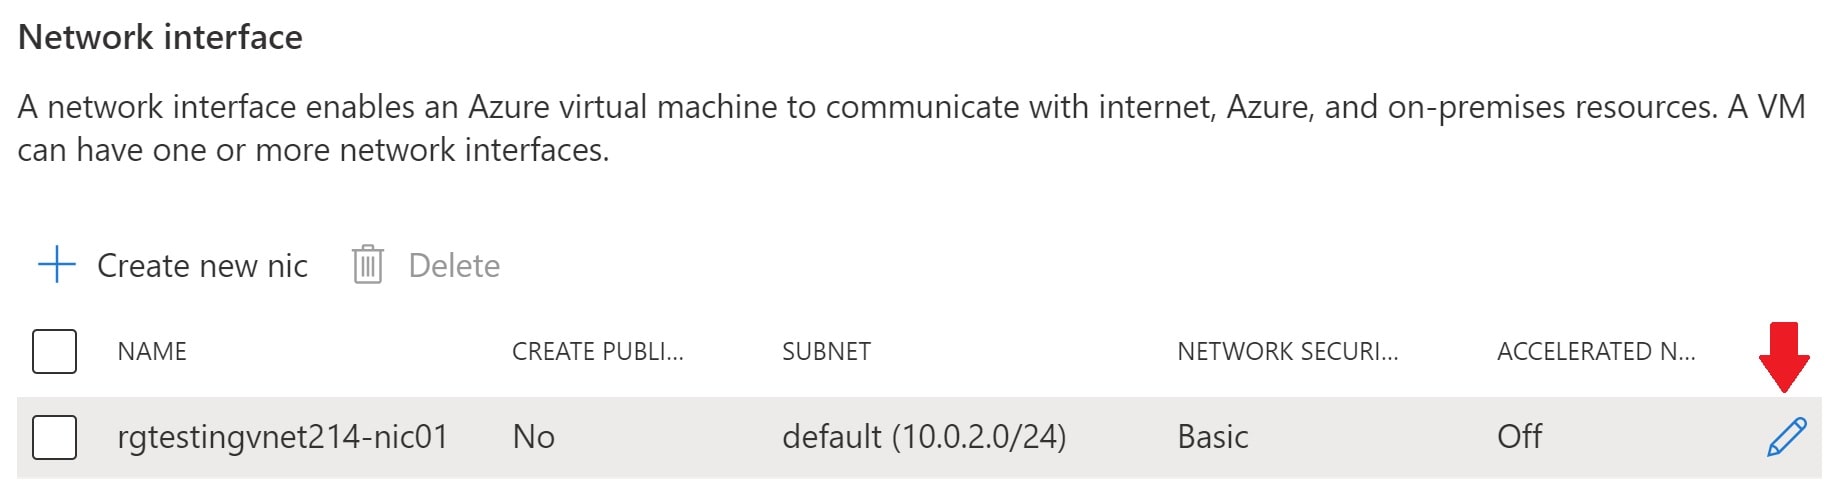
Network interface - A VM can have one or more Network interface. It is this Network interface that enables a VM to communicate with other VMs, internet and on-premises servers. By default, the virtuak machines we create in azure are not accessible over the internet for obvious security reasons. However, you can override this by opening an inbound port. For example, let's say, we want to access the VM over the internet using RDP (Remote Desktop Protocol). For this we need to open the RDP inbound port. If you don't have this port open, you will not be able to RDP into the VM. Click on the pencil icon under Network interface category.
This takes you the following Edit network interface page
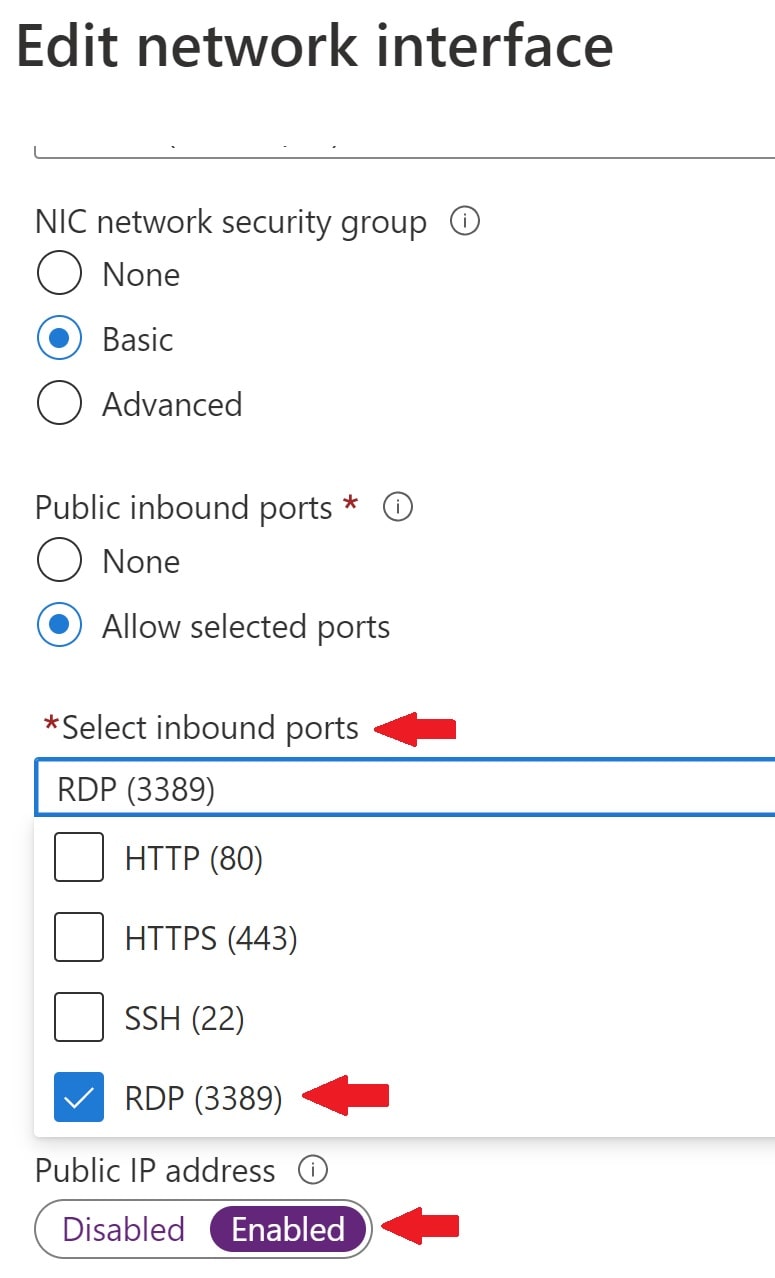
- Under "Public inbound ports", select "Allow selected ports"
- Check RDP (3389) checkbox
- Enable Public IP address - Without this, we won't be able to communicate with the virtual machine from outside the virtual network.
With this configuration we are basically opening up port number 3389 for RDP communication.
Load balancer
If you want a load balance to be created, check "Use a load balancer" checkbox.

This automatically creates a new load balancer and distributes the traffic among all the VMs in our scale set.
Scaling tab
Initial instance count - This is where we specify the number of identical VMs we want in our scale-set. We can create upto 1000 VMs. Leave the rest of the defaults and click "Review + create"
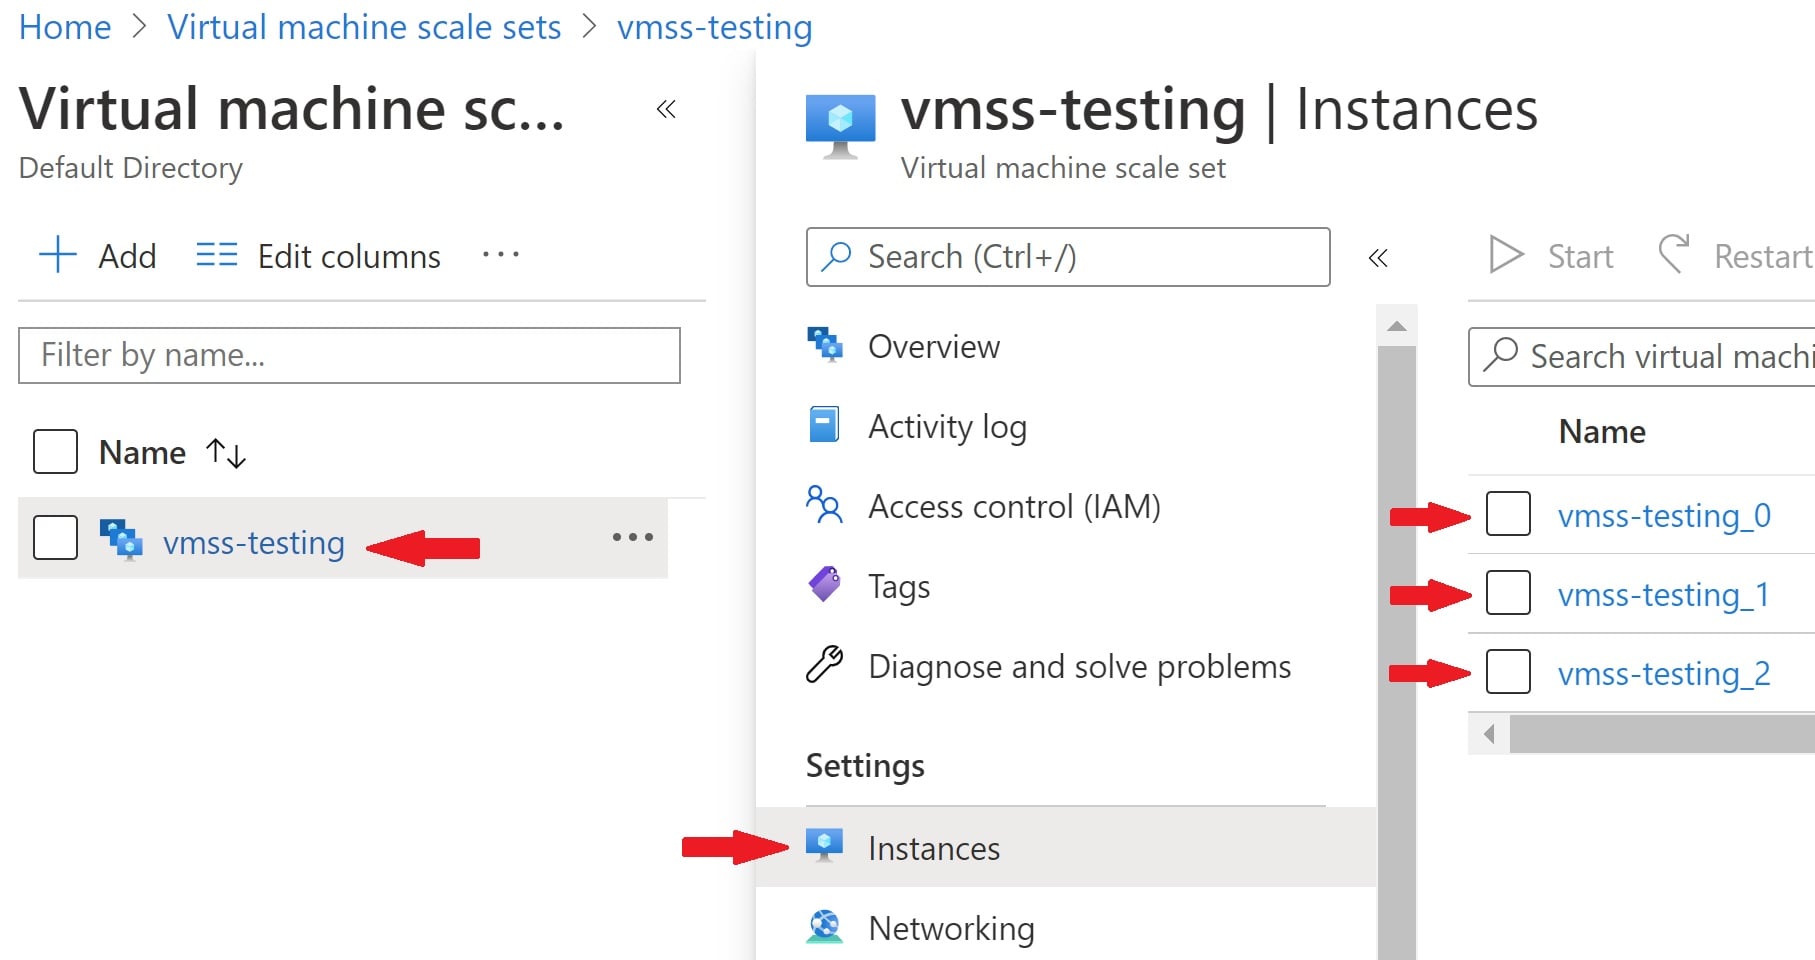
After a few minutes our virtual machine scale set must be created. After you see the message, your deployment is complete, search for VMSS and navigate to Virtual machine scale sets. You should see a Virtual machine scale set with the name vmss-testing
Click on vmss-testing and then on Instances, you will see the 3 VMs in the scale-set.
Click on one of the virtual machine instances. Next click "Connect"
- Click on the RDP tab
- Click on Download RDP File
- Double click on the RDP file and provide administrator username and password
You are now logged on to the virtual machine in Azure.


© 2020 Pragimtech. All Rights Reserved.